Running modern PC games directly on a Raspberry Pi presents significant challenges due to hardware limitations and compatibility issues. However, with some technical adjustments and workarounds, it is possible to set up a Steam environment on your Raspberry Pi, allowing you to enjoy a selection of games. This guide walks you through the entire process, from preparing your hardware to launching Steam, ensuring you have a clear path to start gaming on your versatile Raspberry Pi device.
—
What You’ll Need
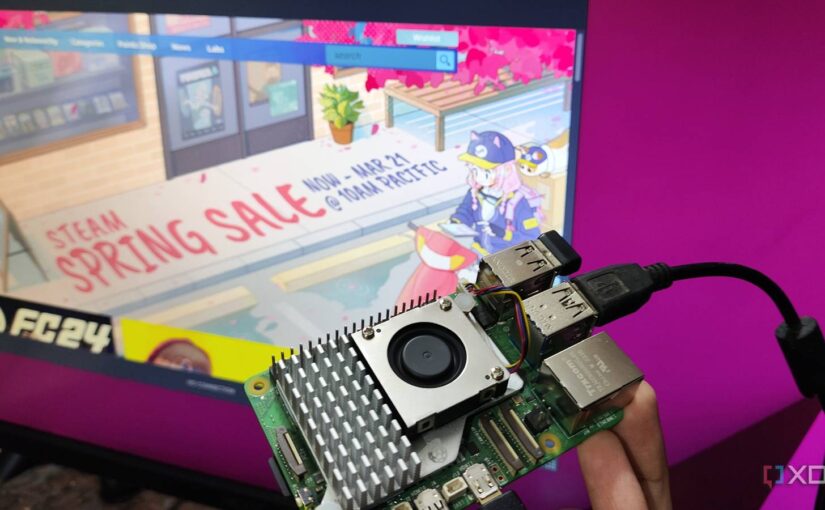
To begin, you must gather some essential hardware and software components. The core of your setup is, of course, a Raspberry Pi board. For optimal performance and sufficient storage, a microSD card with over 64GB capacity is recommended, as Steam games can occupy a considerable amount of space. An external SSD is also highly advisable, as it will serve as the dedicated installation directory for your games, providing faster load times and increased storage.
In addition to hardware, you’ll need a compatible operating system. While the most common choice is Ubuntu, which offers extensive support and flexibility, other Linux distributions such as Raspberry Pi OS can also work with some adjustments. For detailed specifications, the Raspberry Pi 5 features a quad-core Arm Cortex-A76 CPU running at 2.4GHz, up to 8GB of LPDDR4X SDRAM, and multiple ports including USB 3.0, HDMI, and Ethernet, making it a surprisingly capable device for emulation and lightweight gaming.
—
Setting up MultiArch and Cross-Compiler Tools
Because the Raspberry Pi uses an ARM architecture, running x86 or x86_64 applications like Steam requires installing additional libraries and tools. MultiArch support enables your system to handle multiple architectures simultaneously.
- Launch the terminal by pressing Ctrl+Alt+T.
- Add support for the ARM hard-float architecture with:
“`bash
sudo dpkg –add-architecture armhf
“`
- Update your package list to include new architecture packages:
“`bash
sudo apt-get update && sudo apt-get upgrade
“`
- Install the GCC cross-compiler for ARM:
“`bash
sudo apt install gcc-arm-linux-gnueabihf -y
“`
- For managing source code repositories, install Git:
“`bash
sudo apt-get install git -y
“`
- To compile software, CMake is necessary:
“`bash
sudo apt install cmake -y
“`
This setup ensures your system can build and run applications designed for different architectures, a critical step in emulating x86 environments on an ARM device.
—
Installing Box64 and Box86 Compatibility Layers
Two key components enable running x86 applications on your Raspberry Pi: Box64 and Box86. Box64 provides 64-bit emulation, while Box86 allows 32-bit applications to run smoothly.
Installing Box64
- Clone the Box64 repository:
“`bash
git clone https://github.com/ptitSeb/box64
“`
- Navigate into the directory:
“`bash
cd box64
“`
- Create a build directory and generate build files:
“`bash
mkdir build; cd build; cmake .. -D RPI5ARM64=1 -D CMAKE_BUILD_TYPE=RelWithDebInfo
“`
- Compile and install:
“`bash
make -j4
sudo make install
“`
- Restart the binfmt service to recognize the new emulator:
“`bash
sudo systemctl restart systemd-binfmt
“`
Installing Box86
- Return to your home directory:
“`bash
cd ~
“`
- Clone the Box86 repository:
“`bash
git clone https://github.com/ptitSeb/box86
“`
- Enter the directory:
“`bash
cd box86
“`
- Generate build files:
“`bash
mkdir build; cd build; cmake .. -D RPI4ARM64=1 -D CMAKE_BUILD_TYPE=RelWithDebInfo
“`
- Compile and install:
“`bash
make -j4
sudo make install
“`
- Restart the compatibility service:
“`bash
sudo systemctl restart systemd-binfmt
“`
These emulators lay the groundwork for running x86-based software, including the Steam client, on your ARM-powered Raspberry Pi.
—
Installing the Necessary Drivers and Libraries
Before installing Steam, your system needs specific drivers and libraries to handle graphics, audio, and system calls.
Run the following command to install key libraries:
“`bash
sudo apt install libgdm1:armhf libudev1:armhf libgl1-mesa-dri:armhf libglapi-mesa:armhf libglu1-mesa:armhf libglx-mesa0:armhf mesa-va-drivers:armhf mesa-vdpau-drivers:armhf mesa-vulkan-drivers:armhf libsdl1.2debian:armhf libegl-mesa0:armhf
“`
If the installation halts due to missing packages, remove the problematic one and rerun the command. Additionally, install the C standard library:
“`bash
sudo apt-get install libc6:armhf -y
“`
And update Vulkan drivers with:
“`bash
sudo apt install mesa-vulkan-drivers -y
“`
Having these components in place is vital for the proper functioning of Steam and games.
—
Installing the Steam Client
Once the emulators and drivers are set up, installing Steam involves executing a shell script located within the Box86 folder.
- Navigate to the Box86 directory:
“`bash
cd ~/box86
“`
- Run the installation script:
“`bash
./install_steam.sh
“`
- When prompted, enter your password and confirm the installation by pressing Y.
- After installation completes, start Steam by typing:
“`bash
steam
“`
- The client will update itself and launch, allowing you to log in and access your library.
If you experience issues with missing libraries, ensure all drivers are installed correctly and update your system. For a detailed guide on optimizing game performance, you can explore strategies for making a strong game dev team.
—
Running Steam Games on the Raspberry Pi
With Steam running, sign in to your account and browse your game library. Keep in mind that the Raspberry Pi, despite its versatility, has limitations with modern 3D gaming. Performance may only be suitable for older titles or less demanding games, especially at lower resolutions and graphics settings.
For more information on game emulation and optimizing your setup, consider reading about how to emulate classic games on your Raspberry Pi. Although running recent AAA titles isn’t feasible, this setup allows you to enjoy a variety of indie and retro games comfortably.
—
Final Thoughts
Although the Raspberry Pi’s hardware isn’t designed for high-end gaming, with careful configuration and emulation layers, you can experience a subset of Steam’s library. For demanding titles, a dedicated gaming PC remains the best choice. However, for casual gaming, educational projects, or experimenting with game development, this guide provides a solid foundation.
If you’re interested in creating your own games or expanding your gaming setup, exploring franchising options and sequel development techniques in game development can be valuable. Check out this resource on making game sequels for more insights.
—
Note: For the latest updates and advanced configurations, consult the official Raspberry Pi and Steam forums. Keep your system updated to ensure compatibility and security.